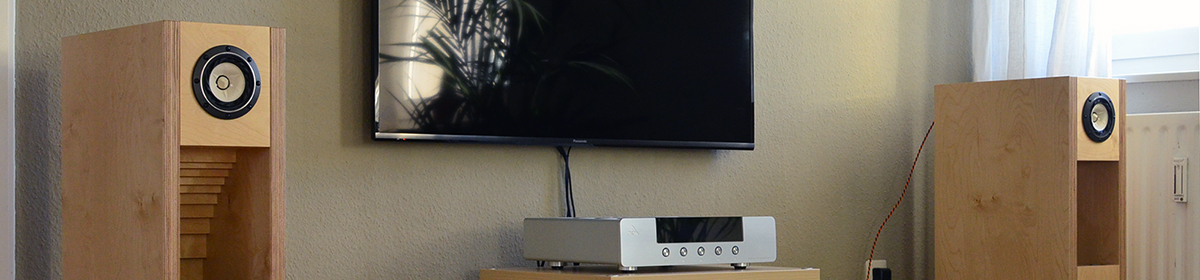

Today I would like to talk about a method for adjusting an audio system with the help of recorded natural sounds. Why natural sound recordings? There are several reasons, but the aim is to make it easier to refer to real-life acoustic events. The first point is that such recordings are made in open spaces—somewhere in the woods or in the fields—which means they are stripped of room resonances and reverberation. Although close-miked studio recordings also eliminate most environmental acoustic artefacts, the resonances and reverberation inherent to the musical instruments themselves may overlap with the reverberation modes of the listening room, making the two relatively difficult to distinguish.
Recordings of human voice could be used as well, but they cover a very limited frequency range, and there may still be some residual acoustic reverberation typical of performances in enclosed spaces. The second point is that, as human beings, we have been exposed to the sounds of natural surroundings—forests with singing birds and myriad buzzing insects, mountain landscapes with running creeks, seashores or lakeshores, falling rain, thunderstorms, and so on—from our earliest experiences, and we have an innate recognition of them developed over the course of human evolution. Another advantage of using recordings of natural sounds while adjusting the system is that prolonged listening sessions tend to relax us, unlike musical performances, which through continuous repetition may eventually become boring or even annoying.
Right now I am using a recording of a bubbling brook to create the illusion that there is a brook inside the listening room. It takes some time and effort before a believable illusion is created. At first it sounds more like a recording being played, failing to create any convincing illusion. There is a sort of electrical glare that hints at the use of microphones and other electronic devices such as cables and equalizers. Some people can even discern certain types of microphones and recording configurations, but that is not what we want here. The system should convey the illusion of being there—at the location where the recording was made.
There are certain steps to be taken to achieve this goal. The first is to let your system reach its optimal operating conditions, which means preheating the amplifier and any active electronic devices so they can reach a stable temperature. A minimum of 30 minutes is usually necessary for the system to play some material before reaching these optimal conditions. This is especially true for biased devices such as transistor and vacuum tube amplifiers, where the bias current changes over time. This is also why some devices incorporate time-delay circuits into their design. Nelson Pass, for example, recommends a minimum of one hour of playback before any serious listening begins. I would say that this is a reasonable minimum. Leave your system playing some material for at least 30 minutes and shut the door; it is better to avoid listening during this initial warm-up phase.
The recording of the bubbling brook, playing in a loop right now, is still boomy—I can hear it. The low frequencies are excessive, giving the impression that the water is not falling onto solid ground but into a metal container or something similar. There is a kind of metallic tint to the sound, but as I already said, it is too early to judge the reproduction, so I am closing the door and leaving it alone. This is really important: let your system warm up properly, because subtle changes are inevitable during this phase. I am curious to find out how much of this metallic glare and boominess will disappear once the warm-up is complete. I know I should leave it for some time before moving on to the second step and begin adjusting the speakers for their optimal placement.
After one hour has passed, I open the door with hope. Well, I can discern that the metallic glare has gone, but the boominess is still there. It feels more like a brook running through a toilet—the sound of flush water falling into the bowl. That is the kind of brook I have at the moment, not a real forest brook flowing over a rocky riverbed. I know it is time for the second step, which comes after the system has warmed up: fine positioning of the speakers.
Usually, when the system is not optimally adjusted, the brook has, as it does now, rather mediocre acoustic qualities. There is a brook in the room, but I can still distinguish certain acoustic traits of the room itself. As long as a hand clap in the room does not sound like a hand clap in an open space, the room is adding something to the original sound. There is an echo created by the room modes, which emphasize certain frequency bands while partially absorbing others. When these effects are superimposed on the original recording, the resulting illusion contains acoustic cues that point toward an enclosed space that was not present at the time of the recording. We refer to such alterations as room coloration—the addition of acoustic characteristics not contained in the original recording. Unless one has listened to the same system in different acoustic environments, it is difficult to recognize the acoustic footprint of the listening room itself. That footprint spoils the illusion of “being there,” replacing it with a sense of “they are here” (the musicians—or the creek, in this case), which is ultimately unconvincing because of the mismatch in scale and our rational awareness that a brook cannot possibly be running through a listening room. This is a clear sign that the system needs adjustment.
You do not need to sit in the sweet spot while assessing the reproduction during this phase. In fact, it is better to stay slightly off to the side to avoid additional imaging cues. Imaging is not important at this stage, so do not try to visualize a creek or any other object. Do not try to analyze the reproduction intellectually either. Forget about detail resolution, soundstage dimensions, bass, and treble. Switch off your analytical mind and relax, just as you would while spending time in nature. Instead of thinking, observe your feelings and try to match them with those evoked by a real brook somewhere in the woods: the chilly morning air, refreshing dew, wet soil, moss and moisture, the force of nature, the relentless flow of water, cold slippery stones, a calming breeze, and so on. Such feelings cannot arise from flawed reproduction, which is far more likely to evoke associations with a lavatory than with a forest.
When working on speaker placement, it is important not to concentrate on imaging but to listen for tonal purity. The best positioning is achieved when the room is no longer present, and this is the main goal: to eliminate the room’s influence. One should continue adjusting until the room disappears and there are no more walls or ceiling. This is something Jim Smith emphasizes in his book Get Better Sound, but it often remains unclear how exactly to achieve it. The main prerequisite is to use a recording that simplifies the adjustment process. If your goal is to create the illusion that there is no room, a recording made outdoors is the most suitable choice. With indoor recordings, it is very difficult to separate the acoustic characteristics captured in the recording from those of the listening room.
It is worth remembering that different speaker positions excite different room modes, especially front-to-back placement, which is particularly important in this regard. As you adjust for tonal purity and the elimination of room effects, you may discover that moving the speakers closer to the wall behind them actually produces better results. At first, I recommend pointing the speakers straight ahead and not experimenting with toe-in. One should first find the best location, and only then consider toe-in and tilt. It is a step-by-step process in which complex tasks are broken down into simple, consecutive adjustments. The distance between the speakers is usually related to their distance from the front wall. Bringing them closer to the wall generally requires increasing the distance between them, whereas moving them farther into the room usually requires bringing them slightly closer together. Keep this relationship in mind as you experiment. If you have nearby side walls, try to keep the speakers as far from them as possible, unless they are specifically designed for corner placement, such as Audio Note or Klipschorn speakers. At some point the sound of the flowing brook will open up, and you may feel immersed in the cold air, perhaps even shuddering at the sensation of fresh morning dew. This is a clear sign that the room has disappeared and that you are transported to the place where the recording was made. The absence of unnatural room resonances frees your mind from associations with sound reproduction, leaving only a deep sense of relaxation and well-being.
Now it is time for the final adjustments and speaker toe-in. It is better to sit in the sweet spot, but once again, do not try to analyze the soundstage or other sonic attributes. Simply pay attention to your feelings—to the sensation of standing beside a brook flowing through the forest. In non-symmetrical rooms like mine, non-symmetrical toe-in adjustment also makes sense. This means that the speaker closer to the side wall should have slightly more toe-in than the speaker farther away. I have described such a case here. The interesting thing is that when the goal is to eliminate the room and achieve emotional realism, a natural and believable soundstage emerges almost as a by-product. In my system and room, the soundstage is somewhat compact, but it possesses a density and gravity that are striking. It may not be as wide or as detailed as when the speakers are positioned farther from the wall, but the tonal colours are more vivid and the emotional impact is on another level. This contributes greatly to long-term listening satisfaction and to the sheer pleasure of listening to music.
I hope that, for some of you, the method described above for dialing in a system will prove useful.
Thank you for stopping by, and as always, happy listening!