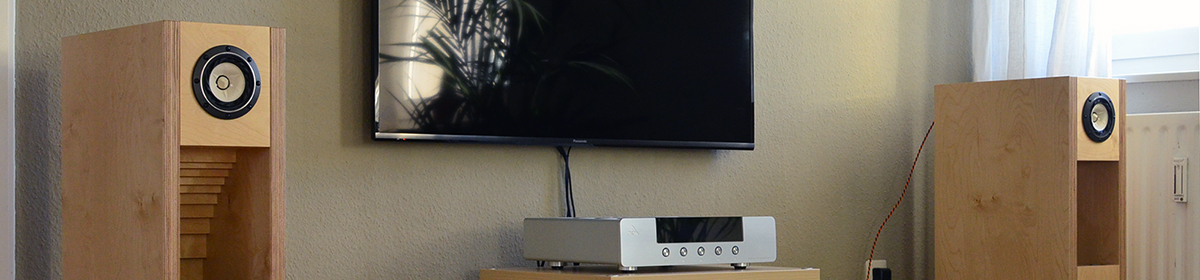
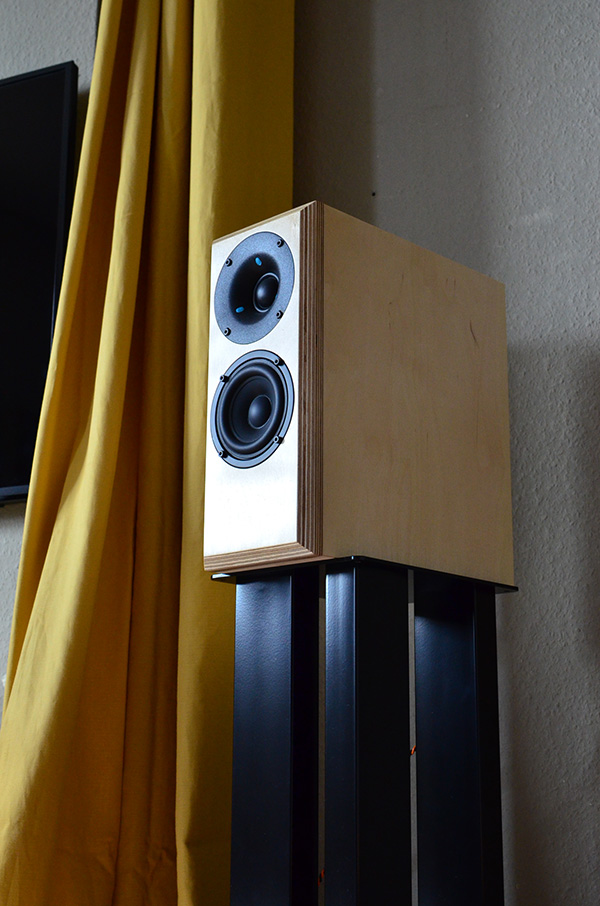
I don’t really know why I decided to build these particular speakers, which were introduced to the public through the pages of Hobby HiFi magazine. Perhaps it was the unusual concept that caught my attention in the first place — a two-way design combining a long-excursion 4.5-inch woofer with a 3-inch dome tweeter in a relatively compact yet extremely rigid enclosure.
As Bernd explains in his article, this project would not have been possible without two key ingredients: the exceptionally low mechanical losses of the Wavecor SW118WA02 woofer, which are essential for achieving good low-frequency detail retrieval, and the availability of another Wavecor driver — the TW030WA12 dome tweeter — which is capable of maintaining a flat response from 1 kHz all the way up to 35 kHz.
The latter characteristic makes it possible to set the crossover point well below the woofer’s natural cone break-up resonance at 2.5 kHz. According to Bernd’s measurements, a second-order filter with a 12 dB-per-octave slope beginning at around 600 Hz represents the optimal operating condition for this driver.
Acoustic and electrical measurements were then carried out, and all collected data were entered into the AJHorn simulation software. After extensive calculations, the software concluded that a 7-litre bass-reflex enclosure would be sufficient to allow the woofer to reach its theoretical limits — namely 39 Hz at –3 dB.
Although real-world measurements proved AJHorn slightly optimistic, an impressive 42 Hz at –3 dB was achieved in Timmermanns’ laboratory in Kleve, Germany.
What I like about Hobby HiFi magazine is that every speaker project is thoroughly documented — all the electrical and acoustical measurements of the speaker’s combined response, as well as the parameters of the individual drivers, enclosure construction, choice and distribution of damping material, crossover network schematics, and possible tweaks are presented alongside subjective listening impressions and much more. This allows one to gain a deeper understanding of the speaker’s construction and of the way all the parameters interact with each other. Good documentation is a very important factor when deciding which recipe to follow, but there are other indicators one might consider as well — user feedback, listening impressions, costs, availability of enclosure kits, assembly difficulty, and so on.
It was something in Bernd’s description of their sound that caught my attention and aroused my curiosity the most. The choice of particular adjectives, the alternation between passive and active verb forms, and the subtle traces finding their way into the sentence structure revealed his sincere awe in front of his creation. Human voices, for example, possessed a kind of shaped substance or plasticity (“Stimmen wirken außerordentlich plastisch und natürlich”) that distinguished them from everything else — it was about a tangible presence of another level, one that approached the live event in an unprecedented manner. You have to know, dear reader, that I am familiar with Bernd’s way with words, as I have read dozens of his articles. I have learned to read between the lines, considering not only what has been written but also what has been omitted, and how it relates to his writing style and established patterns of expression.
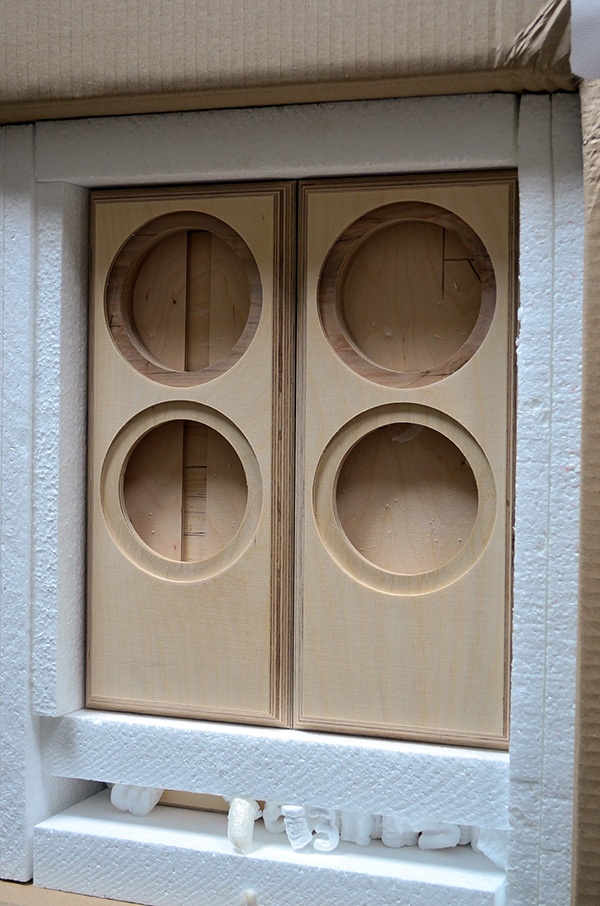
There was even more, if I have to be precise — there was a wave of positive feedback from DIY enthusiasts who built the first Micro Block version after its release in 2015; the price of the kit (€450 per pair) falls well within the range of affordability for the average person; and, as a bonus, there is a CNC-machined enclosure kit available from Ebel Holztechnik in birch plywood or MDF, designed in such a way that no clamps are required for assembly. I was also considering trying something completely different from my horn speakers — something based on modern technology, with low efficiency, a wide frequency range, and a textbook-flat response.
I also have to mention my fascination with the Do-It-Yourself culture in general. Going through the complete process of building a loudspeaker — something that requires days or even weeks of voluntary work — greatly increases the excitement and emotional value of the moment when the project is finally completed and the sonic evaluation can begin.
Placing the speakers on their stands, connecting the cables, warming up the amplifier, and deciding which piece of music will be the first to flow through them after all that effort — every step is filled with anticipation and uncertainty. It is a completely different experience compared with purchasing a commercial product, where the process begins and ends with simply exchanging money for a finished item.
Even this alone is enough to justify the challenges and risks involved in such an adventure into the unknown.
Then comes the moment of truth: the first notes filling the room and the immediate impression of the speaker’s character. In a fraction of a second, the complex behaviour of acoustic waves is compared against established references, previous experiences, and expectations.
The reaction can be a smile, confusion, surprise, or even disappointment.
In the case of the Micro Block MK2, the first reaction was a broad smile accompanied by a feeling of relief and satisfaction. “These speakers are something special,” was my first thought, and the longer I listened, the wider that smile became. I found myself increasingly fascinated and almost amused by what these little speakers were capable of achieving.
Only later did I fully appreciate how grateful I was to their creator, engineer Bernd Timmermanns, and how much I wanted to express my appreciation for creating something so beautiful — something that invites the listener to enter another world, one shaped by musical instruments and human voices transforming abstract ideas into harmony, melody, and rhythm.
Construction
As mentioned earlier, the Micro Block is a two-way design combining Wavecor’s 4.5-inch paper-cone SW118WA02 woofer and the 3-inch silk-dome TW030WA12 tweeter in a 7-litre bass-reflex enclosure.
The tweeter’s extended frequency response, together with its waveguide faceplate for controlled dispersion, allows for a relatively low crossover point of 1.3 kHz. This is beneficial for achieving a more natural tonal balance and seamless integration between the two drivers.
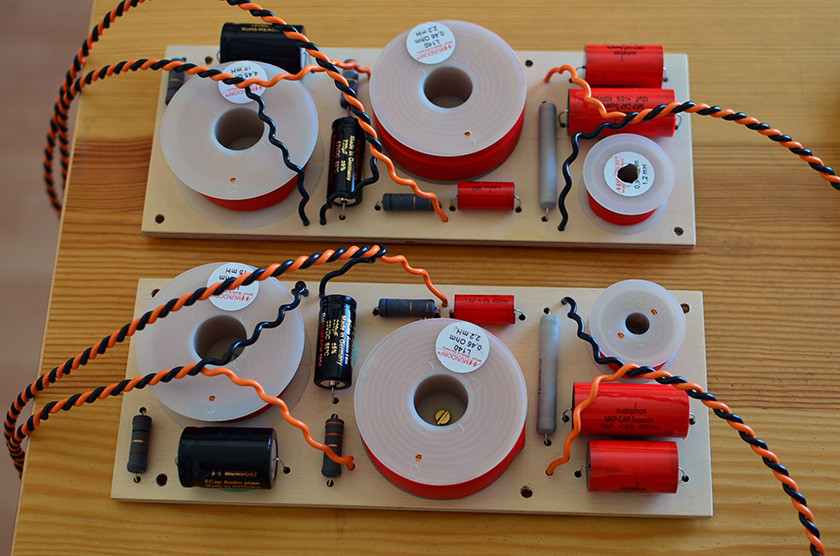
The bass-reflex port has a diameter of 5 cm and a total length of 25 cm, incorporating two 90-degree bends. The crossover network uses a second-order low-pass filter for the woofer and a third-order high-pass filter for the tweeter.
This configuration places the crossover point exactly 6 dB below the combined response and ensures optimal phase alignment between the drivers. An additional LCR circuit connected in parallel with the woofer smooths the impedance peak caused by the interaction with the port and also helps flatten the frequency response between 80 and 300 Hz.
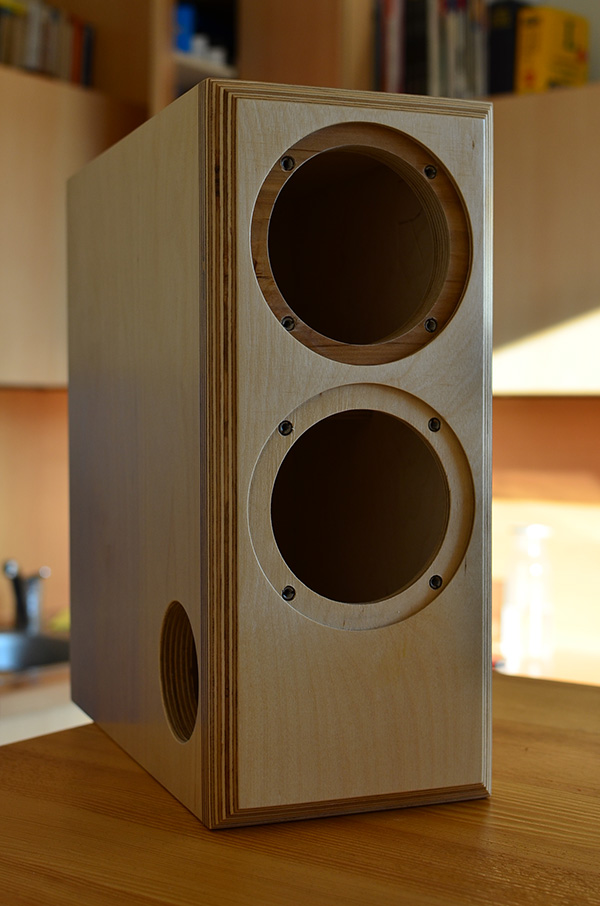
The enclosure is extremely solidly built, using 24 mm plywood for the front baffle and 19 mm plywood for the remaining panels. Internal cross-bracing made from the same material further increases rigidity.
Damping is provided by 2 cm-thick polyester felt. The port is mounted on the side, which is a characteristic feature of Bernd Timmermanns’ bass-reflex designs. This approach provides better acoustic phase behaviour than a rear-firing port while avoiding the potential midrange disturbances associated with front-mounted ports.
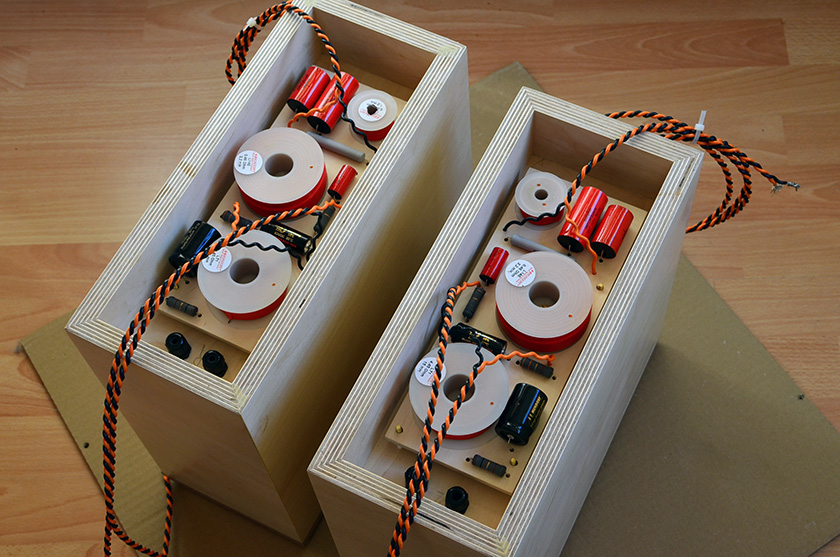
The crossover network is mounted externally on the rear of the enclosure, providing a resonance-free environment for the electrical components.
Frequency response (–3 dB): 42 Hz – 35 kHz
Sensitivity (2.83 V / 1 m): 80 dB
Impedance: 8 Ω
System Optimizations
After the initial construction was completed and the burn-in period — during which the driver suspensions and the characteristics of the electrical components gradually settle — had passed, two major improvements were introduced.
The first and most significant came from implementing an impedance linearization network. This is essentially an LCR series circuit connected in parallel with the speaker terminals.
Normally, every speaker project published in Hobby HiFi magazine is accompanied by a dedicated impedance linearization network, which Bernd Timmermanns strongly recommends, especially when the speakers are used with tube amplifiers.
The reason is that tube amplifiers perform best when presented with a relatively constant impedance load, allowing them to maintain proper control over the loudspeakers. Unlike transistor amplifiers, vacuum tubes are voltage-gain devices and require output transformers to convert voltage into current. This additional complexity makes them more sensitive to impedance variations in the load.
Most loudspeakers exhibit an impedance peak around the crossover frequency, where both drivers operate simultaneously and the impedance can easily rise to several tens of ohms. In the case of the Micro Block MK2, the impedance reaches approximately 30 ohms at the 1.3 kHz crossover point.
By flattening this peak, the entire system comes into balance. The subjective impression is almost as if the amplifier has gained additional power and significantly improved control over the speakers. The soundstage becomes deeper, voices acquire more shape and physical presence, and the overall improvement is simply remarkable considering the relatively small investment involved.
As I wrote in an email to Peter Qvortrup:
“It wasn’t until recently that Oto revealed its full potential and showed me what it was truly capable of. The only thing it required was a relatively constant impedance load. Flattening the 30-ohm peak at the crossover frequency with an LCR series network turned out to be the key to unlocking its power and allowing it to breathe freely.
It is not that I hadn’t previously tried implementing an impedance linearization network across the speaker terminals, but I always noticed some degradation in sound quality. As it turns out, this was caused by the inexpensive electrolytic capacitors I had used.
Now, with the 33 μF Mundorf mCap Evo Oil in place, I feel that I have finally discovered the missing piece and understood what a high-fidelity system is truly capable of.”
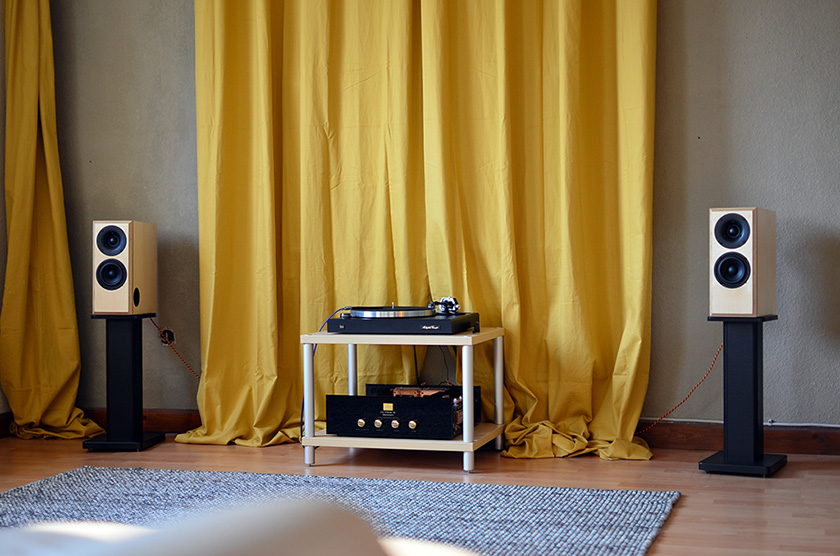
I cannot recommend trying such a network highly enough if you are using tube amplification and your speakers do not already incorporate one. What you need is an impedance curve measured across the frequency spectrum and an appropriate Zobel network designed to address the impedance peak at the crossover frequency.
The second big improvement came from the Audio Note AN-K speaker stands that Peter sent me to try.
This is one of those experiences that is difficult to describe unless you have encountered something similar yourself. I believed my sand-filled MDF stands were already quite decent, but after assembling the steel stands and placing the speakers on them, I was genuinely surprised.
The increase in weight and energy in the lower frequencies, the improved clarity, separation, and physicality of individual voices were far beyond what I expected.
Peter further recommends filling the stands with approximately 15–20 kg of birdshot, which can usually be purchased from hunting supply stores. This experience made me realize just how important stand quality is. It genuinely makes a difference, and the investment is absolutely worthwhile.
Fine tuning
One of the things I particularly enjoy about exploring DIY projects is the ability to continuously experiment and fine-tune different aspects of the design — damping, port tuning, and crossover adjustments — over extended periods of time, gradually extracting further improvements in performance.
The reality is that even if he wanted to, Bernd Timmermanns has limited time to explore every possible scenario. He has to deliver three complete speaker projects, including measurements and documentation, every two months — the interval at which a new issue of Hobby HiFi is published.
This leaves the DIY enthusiast with an opportunity to continue refining the design and uncovering improvements that the original project may still have hidden. Addressing small issues and optimizing minor details can accumulate into meaningful gains in the final result.
Many speaker builders consider fine-tuning to be an endless process. I agree with this to a certain extent, although there is eventually a point beyond which improvements become so subtle or difficult to identify that one can reasonably conclude the available potential has been fully explored.
After three months of experimenting with the Micro Block MK2, I would say that their performance has reached a level where there is very little left to wish for.
I experimented with different damping materials and various combinations of them. Some options were quickly discarded, while others required more extensive listening before a conclusion could be reached.
Bernd’s original approach for this speaker is to use 2 cm-thick polyester felt, known as Bondum 800. This material covers the top, rear, bottom, and one side wall—the side where the port is installed.
I eventually modified this arrangement slightly by replacing the polyester felt on the top panel with 1 cm-thick self-adhesive fleece made from recycled textile material, known as Dämmvlies 10 PRO. I also added a strip of the same material to the upper section of the uncovered side wall.
My impression was that, in the immediate vicinity of the tweeter, this material performed better than the polyester felt.
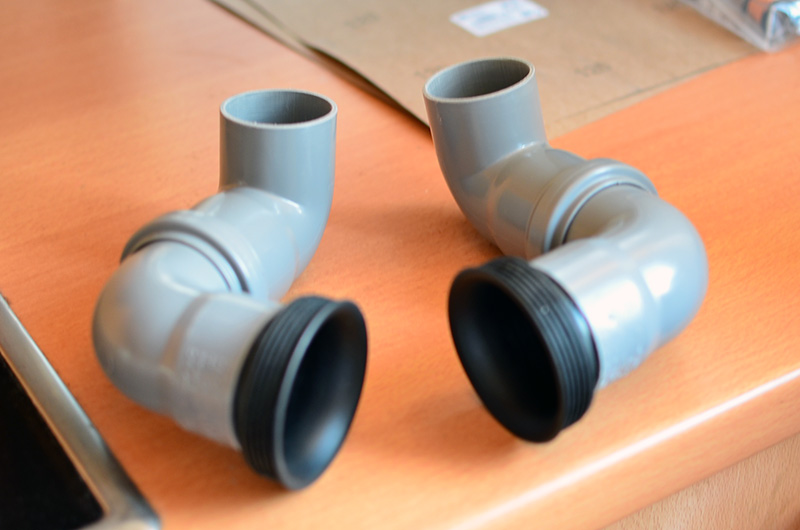
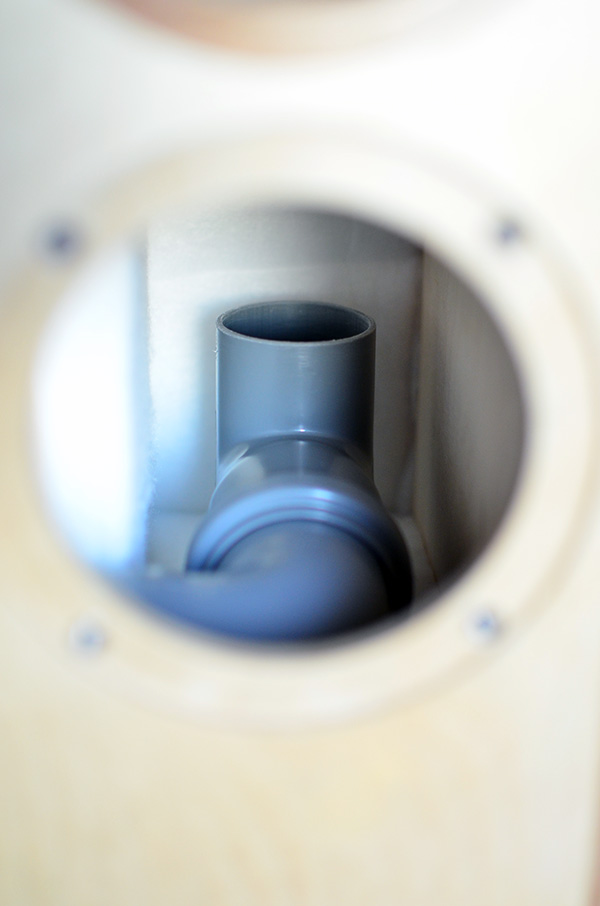
I also experimented with the bass-reflex channel, which incorporates two 90-degree bends in order to achieve a total length of 25 cm and a diameter of 5 cm within the speaker’s compact internal volume.
After the first bend, which directs the channel towards the rear wall, I tried different angles and orientations of the port opening. In the end, however, I had to acknowledge that Bernd’s original solution was already optimal.
I therefore returned to the original configuration, with two 90-degree bends and the port opening facing the top panel.
The only modification I made was adding a flared opening to the port throat, which also allowed me to extend the total port length to 27 cm. This modification brought a noticeable improvement in midrange clarity, along with tighter and more firmly anchored bass.

The crossover design is where this second iteration of the speaker is all about. I experimented by trying the initial version of the speaker without woofer impedance linearization circuit and a second-order filter for the tweeter, simply to understand the contribution of each element.
It quickly became obvious that the MK2 version, with its more sophisticated crossover network, represented a significant improvement.
This is where Bernd’s expertise and experience become particularly apparent. It was confirmed that even small deviations from the recommended component values only reduced the wonderful balance and coherence that define this speaker.
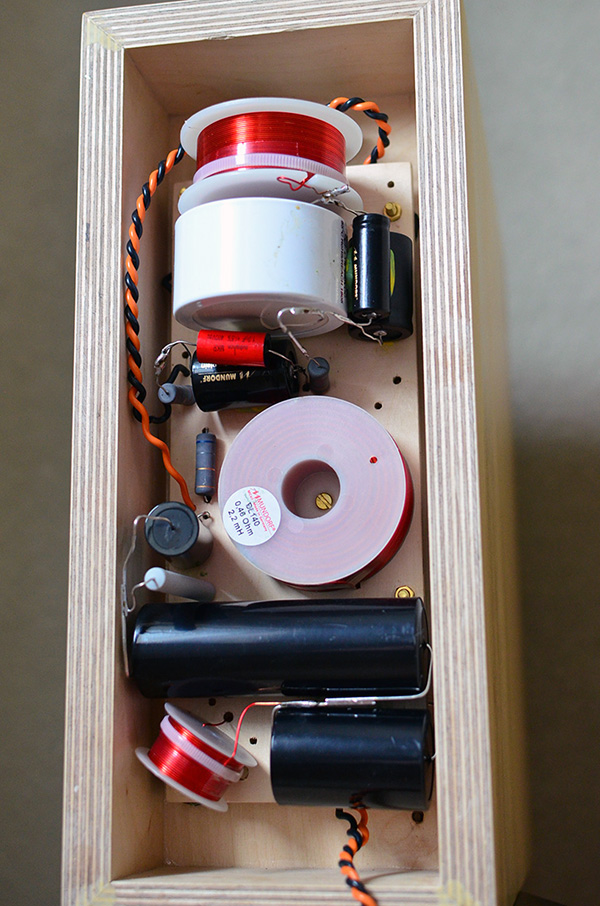
Nevertheless, I discovered a slight improvement in clarity by rotating the 15 mH inductor — the one forming part of the Zobel network connected across the woofer — into a perpendicular orientation. This changed the direction of its magnetic field and increased the distance from the adjacent inductor.
It appears that when two inductors are placed close together and in the same plane, they can magnetically interact, negatively affecting the sound quality.
Conclusion
In conclusion, I have to say that these speakers, driven by the Audio Note Oto SE Signature, combined with a dedicated impedance linearization network and AN-K steel stands, surpass anything I have previously had the pleasure of listening to.
The magic happens in the midrange. Human voices emerge with a tangible presence that never fails to bring a smile to my face. Listening to beautifully recorded albums such as Herbie Hancock’s Gershwin’s World (Verve Reissues, 2015) is an experience that is difficult to put in words.
The Micro Block MK2 excels at conveying human presence and realistic dynamic contrast. Sound sources have shape, body, and a convincing sense of physical weight that makes music listening deeply engaging.
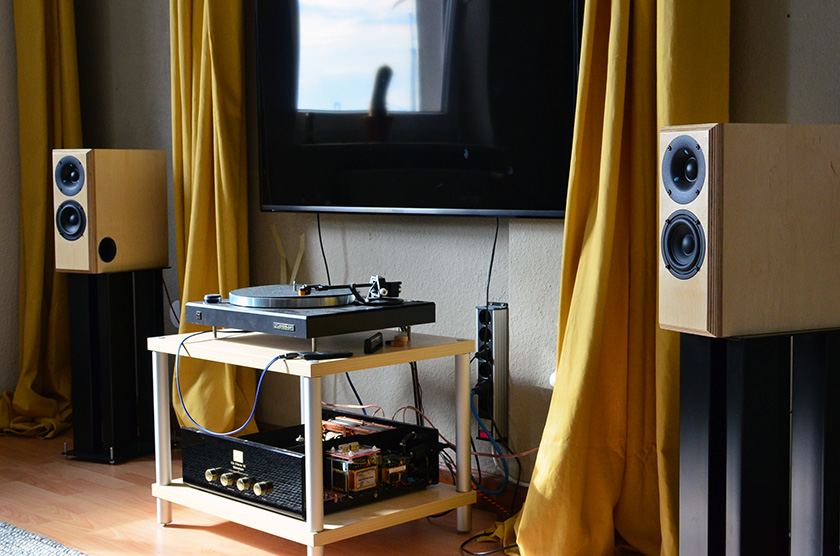
Compared with the BK108, the Micro Block MK2 cannot quite match the horn’s low-level detail retrieval or the coherence of a single-driver impulse response. Guitar rasgueado, for example, sounds sharper through the single-driver horns, and they provide a clearer sense of the recording venue.
Dynamic contrast is quite similar between the two designs, however. The Micro Block MK2 are fully capable of reproducing sudden bursts of energy and returning naturally to silence.
Where these two-way speakers truly excel is in their frequency balance, neutrality, and lack of obvious coloration. They bring the listening experience closer to the original event and approach the clarity and precision often associated with high-quality headphones.
While the horns are particularly suited to acoustic music, the Micro Block MK2 allow me to enjoy a much wider range of recordings and musical genres.
When weighing their strengths and weaknesses, my preference ultimately falls on the side of Bernd’s two-way bass-reflex design.
These speakers genuinely rock, guys, and I can wholeheartedly recommend them.
Thank you for stopping by, and as always, happy listening!
Hi Dimitar
With great interest I have read your report on the this exciting new project.
I am about to order this kit for myself and would like to ask if you were able to share the list of parts you used for the crossover including the construction scheme (unfortunately I do not have the Hobby Hifi issue currently available).
Here a list of parts is published and was wondering whether if you have used these very parts? However, somewhere in your report Mundorf mCap Supreme capacitors are mentioned, that I am unable to find in this list.
One more question: how difficult was the assembly of the speaker housing provided by Ebel Holztechnik and did you use any clear lacquer respectively for finish?
Thanks!
Hi Simon,
Thanks for your interest!
The kit you are referring to is the so called high-end recommendation, I haven’t tried it.
If you decide for the budget version of the crossover it is a good idea instead of the regular air core coils to go for the Mundorf baked varnish air core coils that are just slightly more expensive but the improvement in sound is noticeable. If your budget allows, you can also opt for the Mundorf copper foil coil inductor in the low-pass filter, though its price is higher than the price of the woofer itself.
The default Audaphon foil capacitors included in the budget version of the crossover are not bad but you can achieve further refinement in sound by replacing them with better ones. Though Mundorf mCap Supreme capacitors are very good match, they are quite bulky and tricky to mount in the limited space at the back, so I would advice you to try something else instead – Jantzen Audio Superior Z-cap, Intertechnik Audin Cap Plus or Mundorf MCap Supreme Evo Oil come to mind.
A printed version of the Micro Block MK2 article from Hobby HiFi is included in the kit, I have no right to publish it, but I may ask Bernd if he would allow me.
For mounting the speaker drivers on the baffle I use bolts in combination with threaded inserts which allow for easier mount/unmount procedure and avoiding the danger of destroying the fragile screw holes. At the same time threaded inserts are tricky to implement so you might consider Serfix inserts that Bernd himself uses in many of his projects.
Assembling the enclosure is a breeze, it is a CNC machined one so tolerances are kept to minimum, you need a wide enough scotch tape and a brush for distributing the glue evenly. I used a clear spray lacquer, but a regular one or varnish might do as well, it is a matter of preference.
Regards,
Dimitar
I no longer recommend the use of metal inserts and bolts to mount woofers featuring stamped steel chassis. These impart kind of metallic coloration to the sound that harms the midrange colors. Twitters with plastic face plate might benefit though.
Hi Dimitar!
I was inspired by your article about these speakers and decided to build a pair and see what i think about them. I even thought of using 5 of them in a home cinema setup in my living room. Its about 60 m². Most often i use moderate volume but based upon yor experince with them, do you think its a good idea?
Regards Jörgen
Hi Jörgen,
Micro Block MK2 are really nice compact loudspeakers, I am glad you decided to build them and hope you’ll share your experience with us. I find the idea of using 5 of them in a home cinema setup slightly impractical though. I am not into multichannel audio but I associate it with the use of a center speaker, subwoofer and satellites. The center speaker could be a horizontal line array made of several full-range units from the same type or a MTM D’Appolito arrangement, the subwoofer could be dipole or conventional, for satellites I would use a single-driver construction that would work well when mounted on the wall. This will save you space and money that otherwise has to go for crossover parts.
But honestly if I have to make a choice I would stick to two-channel stereo. I heard also people complaining that a vast majority of the Blu-ray production nowadays features a quasi-multichannel sound that is not really taken on the field but engineered in the studio. At the end of the day two-channel stereo might sound quite three-dimensional and real with a proper program material. I have to tell you that some EMI Electrola Quadraphonic records from the seventies simply blow me away in terms of spatial presence and plasticity of voices and instruments.
Regards Dimitar
Did you ever do any frequency response or distortion measurements of the final speaker?
The design seems to be stretching the woofer higher than it was meant to go, and the tweeter lower than it was meant to go.
Thank you, David – Canada
Hi David,
I haven’t done any measurements of the speakers, this project is very well documented on the pages of Hobby HiFi magazine with all the measurements included. Bernd Timmermanns – the engineer who developed these speakers has done all the work so I don’t need to do it myself.
Cheers,
Dimitar